
Restoring The Mast.....
This weekend I started cleaning up the mast and taking off all the old hardware that wasn't riveted on. This was going to be just a one weekend project but of course I under estimated the work required to finish the job. As it sits right now, the mast and boom are primed and the finishing work have to take place next weekend.
Friday after work Richard took off all the old cleats, sheves, blocks and wind vane from the mast so we could get right down to work on Saturday. Upon inspection of all the old hardware it was obvious that the cleats would have to be replaced but the blocks should be ok to reuse. The sheves will require more work to clean up but I don't think I will be able to find replacements very easy anyway.
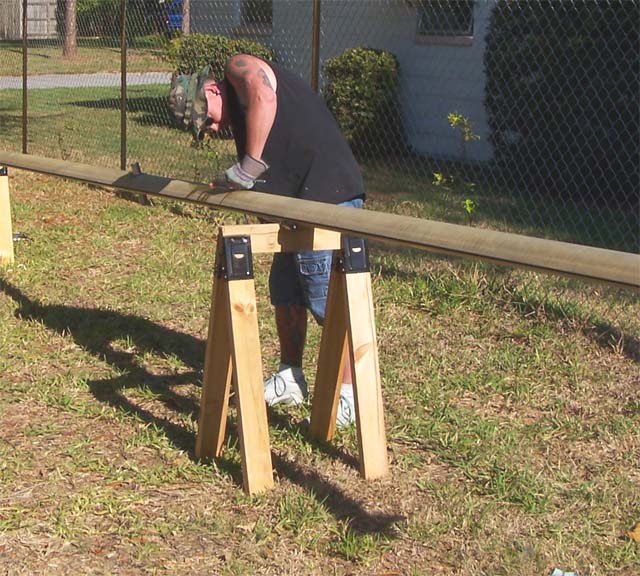
First thing we did was run down to West Marine to get some new cleats and clovis/clevis pins. The aluminum cleats were about $30 a pop and I need 4. Ouch. So we replaced them with nylon cleats at $7 bucks a pop and they should work just fine. The hardware is stainless steel and the load is vertical, not horizontal like on a deck cleat where they would break. I ended up not buying the clovis and clevis pins there as I might be able to buy them cheaper online. When we got back home we discovered a problem. The holes on the new cleats were different than the old ones on the mast. Same size screws, different distance apart. So what we ended up doing was using the top hole from the old cleats, filled in the bottom ones with fiberglass mixed with 404 micro fiber, then drilled and tapped new ones that would fit right. We encountered the same problem with the mast deck light and had to do the same thing. You can see in this picture me tapping a freshly drilled hole.
Here is what the hole looks like with the tap in it. You can see the old mounting hole that was filled in with 404. It was later sanded flush and you can't even tell that it was there once I primed it.

We also drilled and tapped the holes for the VHF antenna bracket and wind indicator extention kit. (was interfering with the VHF antenna)
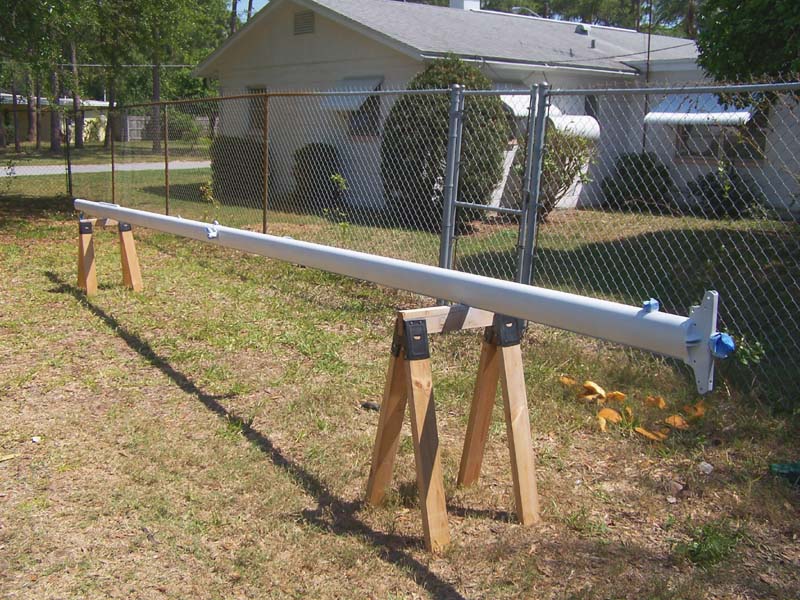
Sunday we sanded down the entire thing, then taped up all the hardware that couldn't be removed. Then we cleaned the surface with denatured alcohol and primed both the mast and boom with krylon metal primer. The initial plan was to paint the entire thing with rattle cans but after doing the primer coat twice, we ran some quick calculations and it turns out for just slightly more money I can use Interlux Brightsides for the final coat. I'm sure that the rattle can job would of worked fine and in some ways could be easier to deal with in the future but Brightsides will last longer. I just mention it in case anybody reads this and is considering redoing their mast.
I know that all sounded like a easy task but I assure you it wasn't. I was lucky that I had a tap and die set that would work. It just paid for itself this weekend. This picture is before we started sanding on it.

This is after two coats of primer, but hasn't been sanded yet for final painting.
I think it looks pretty good so far, better than it did anyway. It won't be completed until next weekend.
Notes, my stitch and glue dory, also received her two final exterior coats of paint. I'm going to do the exterior trim painting after work this week. Next weekend she's going into the water finally! I hope she rows ok, doesn't sink or bury her bow into the waves. I'm really excited after spending 6 months building her to see if I did a good job. It would be heartbreaking if she doesn't work right and I don't really have the time to build another one if I failed. Sink or swim, next week you'll have pictures of it right here.
Alright folks that's it for this weekend. I know priming the mast is boring by comparison to the previous two weeks entries but hey, it all has to be done eventually. Until next weekend....Fair Winds....
posted by Jammer @ 9:30 PM
![]()

0 Comments:
Post a Comment
<< Home