
The BeBop Electric Light Company......
It's been a great week here working on BeBop. All the bits and pieces I needed to install the solar panels and charge controller arrived one box at a time and work began early Friday. By Sunday it was all installed and working fantastic. It's a weird feeling being essentially your own electric company. Yessire, I now have 86 watts of solar powered goodness to recharge my twin deep cycle batteries with a total capacity of 180 amps. In a emergency I have a additional unmounted 5 watt panel and the outboard can recharge a tiny bit too. I just might have the smallest electric company in all the world eh? ^_^
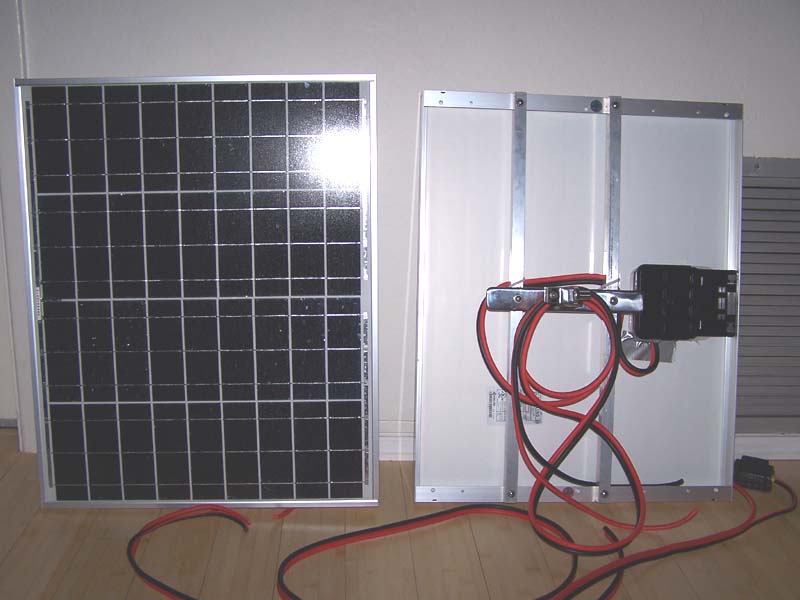
First thing Friday was to fabricate the additional aluminum framework so that I had something to attach the universal stainless steel mounting brackets to. I picked up 2 pieces of square aluminum from Lowe's for this. Looking back at it I should of tried the marine salvage yard first and I might of been able to save some needed money but I knew they had what I needed. Anyway, I used a chopsaw to cut them to the proper length and hand filed the ends clean. A drill press was used to make the holes and the hardware used is stainless. I coated the hardware with anti seize compound to help prevent galvanic corrosion because we are mixing metals here. Here is a picture of the front of one panel and the fabrication work on the back of the 2nd completed. It took about 5 hours to complete both of them. I'm pretty proud of this work, you can't tell it didn't come out of the box this way. You can also see I was trying to charge the panel on the left with the camera flash. I was unsuccessful in getting Rich to hold both the positive and negative terminals on his tongue to see what would happen lol.
This next one is a close up of the box located on the under side of the panel(s). Normally I wouldn't show such a thing but Rich commented on the fact he was unable to locate a picture like this while investigating the mysteries of solar goodness. Therefore I'm putting it up in case anybody wants to see what it looks like. You can see the positive and negative connections, 10 gauge wire was used and zip ties fastened around them so you can't yank them out. 3M 5200 was used to seal the box where the wires come out. Ah reminds me....Lowes...the blood suckers...wanted .40 cents a foot for 10 gauge wire. Rich being quite clever, remembered that the jumper cables that the ghetto marine store....er....I mean Big Lots sells is 10 gauge with heavy insulation and they sell for 5 bucks each. I know it's not marine grade but I figure this is the next best thing and it should last at least a couple of years before I have to rewire it and it's still better than the stuff Lowes was trying to push off at highway robbery prices.

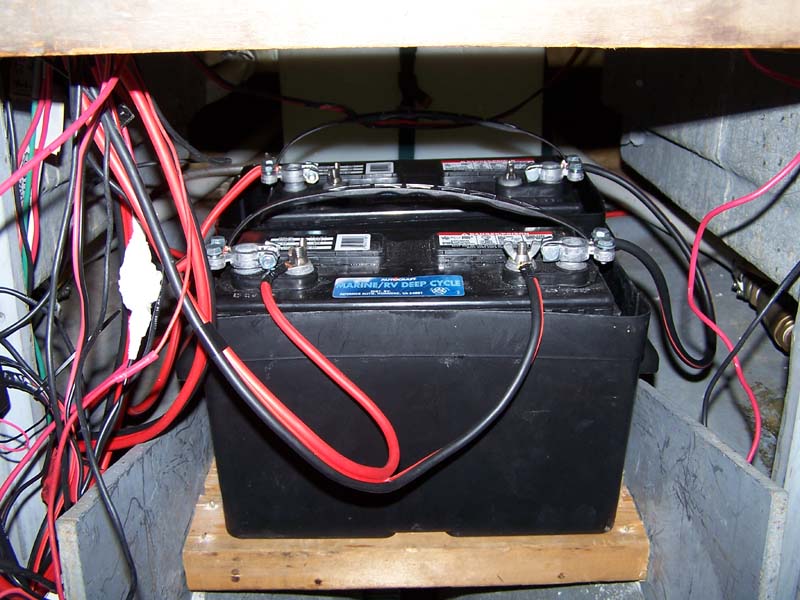
The batteries mounted overtop of the tiny little bilge located under the cockpit wired in parallel using the same 10 gauge jumper cable wire. The autoparts store wanted something crazy like 15 bucks for two feet of the stuff. The battery box tops are off for the photos and I will have them secured in the next day or two too.
The new bus box that everything runs through. It used to be wired directly to the batteries which was such a pain to deal with. I know it still looks like a wild nest of cables but this is a incredible improvement over how it used to work. I'll clean this up with some zip ties soon too.

This is the newly mounted charge controller next to the main switch panel. Yeah I know I need to label all the switches again and make it neater but if you look real close you can read the face on the controller and it's charging the batteries at about 2amps. (the sun was not at a optimal angle around 5pm.....maximum charge rate is about 4.9amps/hr) This baby is great. It will tell you how much power the panels are putting out, how much the battery is taking as a charge, the total amps input into the batteries over their lifetime, the power in amps currently being used onboard, the voltage of the batteries, the % of current charge and it has a built in diode to prevent the panels from discharging the batteries at night. I'm sure I'm forgetting some other things it does but it stops just short of making breakfast so I would say I'm rather impressed with it. Thumbs up from me.

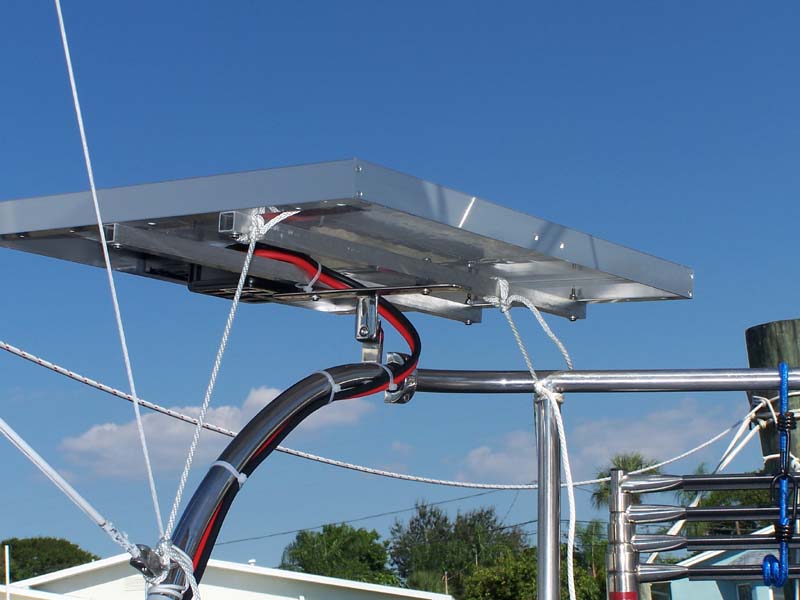
Here is one of the two panels mounted on the stern push pit. I used the nylon line to add support to the single mounting point and it helps stabilize the panels nicely. I want to dig up some extra framing material used to build bimini's at Don's Salvage and add a 2nd support if I can come up with the extra cash. What I've done here works but stainless don't chafe through in heavy weather ya know. You can see how I routed the wired down the push pit. What you can't see is where I drilled a hole going into the cockpit locker and another leading into the bilge, two for each side. They were all sealed up tight using 5200 the next day after everything checked out ok. I will replace the nylon zip ties with riggers tape when I get some more as I ran out the day before, but I needed something to secure the wire with in the meantime while the 5200 sets.
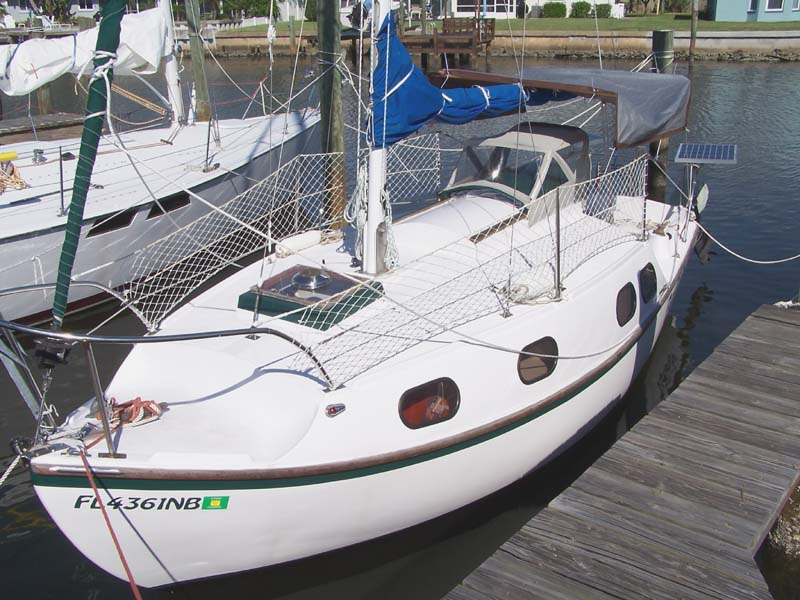
We moved Bebop into a bow in position at the slip so we could keep the panels deployed (I can fold them down or even disconnect them in heavy weather) and the batteries charged. They would of hit the dock otherwise and I rather like it better this way since when your sitting in the cockpit your facing the water not the underside of the dock. You can see the finished lifelines now and the modified boom tent with broomsticks. It ain't that pretty to look at but it's working real nice now and it cost under 10 bucks total! I had a hard time getting a good overall picture of both panels mounted on the stern but you can see them. They look hardcore along with the safety netting and it drew a lot of comments from other people on the dock. I'm proud of how it all came together. I really need to add a big thanks here to Rich for doing the wiring work since it's something he's better at than I am. I must say that I learned a lot though.

I can't really describe just how cool it is to have the panels mounted and working perfectly. Before everytime I turned on a fan or a light all I could think of was how much quicker I was going to have to remove the batteries and charge them at the house again. Now the sun does it for me when I can't even be there. Plus when the batteries are at 100% like today, I can run the VHF (I like to monitor, might just learn something) and the fan directly off what the panels are kicking out without discharging the batteries at all. It's really like having your own electric company without the bill each month....sans the high installation fees. Think I'm going to call it a night now, kinda wrenched my neck drilling the holes in the cockpit lockers so I wanna go rest now.
Next week will be the first overnight offshore (learning) trip....exciting isn't it? ^_^ Until next time Fair Winds......
posted by Jammer @ 11:23 PM
![]()

12 Comments:
great blog, great boat...love those westerly's. the solar panels and installation look really good. you mentioned that you plan to replace the nylon zip ties with rigger's tape. my experience is that the zip ties will last a helluva lot longer than the rigger's tape, leave no sticky residue, etc. i love em.
again, the boat looks great. thanks for the inspiration.
v.joe
(btw, i think you're going to be pleasantly surprised at how well your nomad will self-steer with a sheet2tiller setup once you get the sails balanced.)
Hey Rich, nice to see you leaving a comment after a mere 48 posts. But since you've been so helpful getting BeBop ready I think I'll let it slide this time lol. ^_^
If people wish to leave comments and ideas I'm all for it, some I use, others I don't but it doesn't mean I don't listen to what people have to say.
V. Joe, Good point on the nylon ties vs riggers tape. Cheaper by far, but I was worried about them holding up in the sun. Think maybe I'll leave it as is for now if your experience say they work better. (Removing old tape does suck. Learned that taking the mast down in Georgia.)
Your about the fourth person now who's told me that a Nomad self steers like a dream..we shall see. It's not something I'm going to try with this weeks outting as I have too many other things that need to be tested and fiddled with, but I will be playing around with the concept very soon.
Thanks for dropping by and don't be a stranger. :-)
Jammer
Hey Jammer,
All those mods are looking great. I'll bet you can hardly wait to get gone.
I launched my PSC25 on Sunday and I am in love. I had not sailed her since buying her in Feb. All the new stuff works great and the old boat sails very nicely. With just the 140 genoa up in about 10kts we had hull speed. I'm going to need to do a bit of motor work as the oil pressure drops way low after she gets hot. Oh well the fun never ends.
Oh ya, she now has a name, "Turtle". Seems to fit her to a "T"..........martin
Martin:
Gratz on getting your boat in the water man...it's a great feeling isn't it? (after you make sure she'll float right?) If your getting hull speed at with 10 knots your boat is certainly faster than BeBop. I'll be looking out for small hurricanes to maintain hull speed hehehe. Ok I'm kidding but I do need some wind to get moving at a good clip. Good luck with the motor, I know the feeling...seems like most sailboats have engine troubles.
Deryk:
Good to see you dropping by again. Yeah it's cool to not deal with shore power but don't let it get around or the electric company will start sending out "Non Usage Fees." ^_^ Wouldn't surprise me in the least.
About your dorm fridge...hehehe one wind generator would do it with a couple of batteries or my solar setup might be able to if you got a very low powered fridge. A/C and Refridgeration are power killers on boats...why I don't have them on mine. Be warned..my complete cost was about $900 dollars and that's just for a complete 86 watt setup!! Being off the grid is pricey.
Totally understand about the waterline man...I'm watching mine go down. Good news is with a twin keel I can put her on a sandbar and raise it by a inch if I need to lol. Oh, not living onboard quite yet as my marina doesn't allow but 3 days a week, but am spending more and more time onboard getting ready to go.
Hard to describe my feelings about leaving, excited, fearful in a way, nervous about the unknown, worried about making enough money to eat and keep the boat in good repair, but I've come this far and I won't quit now.
Jammer
Regarding the zip ties, some are good for outdoor use, some aren't. I used to use the black ones on satelite dishes and they would last quite a while while the white ties would disintigrate in a month or two.
Wait.
Maybe it was the white ties that lasted?
Argh! It's been too long and it's too late. One of them works. Honest!! (how's that for useful advice?)
Black zip ties works the best for outdoors, least that's what they tell me. I've never used a white one and the black ones last longer than a month.
At the rate you're going Jammer I half way expect BeBop to have wings soon and leave for Mars instead of a world cruise. The solar panels look awesome!
Gator
Ok, think I"m gonna stick with the zip ties for now based upon what you are all telling me and just see how they hold up. If they start falling apart I can always do rigging tape later right? Was discussing what you guys think about zip ties with Rich earlier in the day, and he said he believes you can buy UV resistant ones. Gonna look for that next time I'm out and about. (np about the colors Adam I have both kinds onboard. ^_^)
Gator you old do....oh...er...uh gator..how ya been? ^_^ Funny you mention about leaving for Mars hehe, I've often said (outside ear shot of her) I think BeBop looks more like a spaceship than a sailboat. She is a bit unusual compared to others isn't she? But that's why I bought her.
Everyone, I'll be out sailing for the next 3 or 4 days and won't have net access to check the comments so I'll catch up with you all Sunday night or Monday. Have a good weekend all!
Jammer
from the oar club, a hurricane update from a gal heading down mexico way on her nomad (maybe you already saw this, if not!!!). v.joe
::::::::::::
Just wanted to drop a line here about my little Andunge (Westerly 22 Nomad) and how she rode out hurricane John. John rode in at a low Cat 2 storm in Puerto Escondido, BCS, MX where I choose to ride it out. I stayed out in the waiting room (outer harbor) which was exposed to the worst of the wind and the waves. My choosing to do so was under the auspice of 'research' and did I ever find out what I wanted to know about the small and mighty Andunge. The largest wave that I saw was aprox. 14 feet and I was only judging that by where it came up to on my mast. Fortunately when that one went by the wind was just so that it was not breaking and it rolled right under me. The strongest gust recorded (by another boat as I only have a manual reader that goes up to 65 knots) was 137k. The same boat recorded 31.24 inches of rain (and spray).
Andunge suffered through 14 full (mast in the water) knockdowns and uncountable partial knockdowns. Also, the better part of 3 hours were spent underwater with breaking waves over the deck. That said, she suffered exactly zero (0) damage and did not leak a drop except when I crawled out the companion way hatch to inspect the lines and such. If anyone is in the market for a boat that is built like a brick s-house and actually sails and sculls well...
just noticed an earlier entry concerning your nesting dingy. are you connecting the halves with bolts only? i built the catspaw2 nester (b&b yachts design) and, man, it was a bear to put together and take apart(definitely a two man job). past winter i modified it with hooking L-brackets. heaven. can't recommend it enough. nesting is now an easy one man job in the water. here's a link to the schematics. http://www.messing-about.com/forum/viewtopic.php?t=2064&highlight=nesting+dinghy+connecting
the mod was pretty painless, btw.
take care. v.joe
Still out sailing? Lost at sea?
That "lost at sea" comment was a joke; but now I'm beginning to wonder. Is everything alright? Anyone know anything about Jammer's where-a-bouts? Did he start his big cruise earlier than expected? Is he stuck in a Mexican prison someplace?
Did he follow the cardinal rule of keep the sea on the outside and crew on the inside?
There are no dates on the comments (odd, since the times listed don't mean much without dates) but it seems like it has been at least a couple of weeks, maybe longer, since he went on his 3 or 4 day sail. I'm getting a little worried.
THis was a great post for me. It will really help whenI am ready to mount the panels on s/v Zen
thanks
Post a Comment
<< Home