
I'm a Hardcore Headliner.....
Sorry for the delay in getting this post up, but I've been very busy between work, answering other peoples emails and working on BeBop so I waited til I reached a milestone before writing up another entry.
For the past two weeks I've really been working hard to get BeBop ready for the new headliner. After sanding off the remains of the old headliner, the interior was totally messed up and covered with fiberglass. It took a whole day to get her cleaned out. I also needed to repair any holes in the bulkheads from old fixtures etc that I didn't want to use. You saw in the last post the enlarged base for the marine head that I had to fabricate. I needed to sand and paint it also before I could go any further with the interior. Finally after a month of looking at the horrible bare fiberglass, she was ready.
A month ago I purchased UV protected indoor/outdoor carpet measuring 15ft X 6ft at Home Depot. It was cheap, only cost $55 for the entire amount. I really investigated how I was going to get it up and there were all kinds of people with all kinds of opinions. I ended up going with what my gut said (and Rich agreed) and that was to use automotive type spray adhesive. We ran a test with it and it worked very well so we stuck with it. (pardon the pun) You can pick it up at any auto parts store for about 8 bucks a can. I ended up using just about 4 cans to put it all up. It's very easy to use, just liberally coat both surfaces with the adhesive, wait about 3 minutes and when you put it up the two pieces bond together nicely. It's amazing stuff really, considering it's holding power but still allows you a limited amount of wiggle room to position the carpet as needed if you have it in the wrong spot. Put another way I had to trim it in a couple of places after it dried and it was strong enough to remove the paint. I have a bit of touch up to do, but it's less than 5 minutes work.
The procedure goes something like this.
1. Make a overall plan as to how your going to cut out the pieces. Also make sure you do not change the orientation of the carpet weave when you cut the pieces or it will look messed up.
2. Tape up newspaper, posterboard etc to create a template to the area you need to cut the headliner out for. We used newspaper, painters tape, a grease pencil to mark the outline of the ports onto the newspaper and a exacto knife to trim it all down to size.
3. Take the template and place it on the backside of the carpet and draw the outline onto it. ***IMPORTANT*** You must reverse the template or you'll cut out the piece exactly backwards. (it's like looking into a mirror) I didn't, but I came close twice. Think before you cut!!
4. Cut it out using a carpet knife.
5. Test fit the piece to make sure it's accurate and you won't have too much to trim off once it's up.
6. Apply the adhesive to both surfaces and wait between 3 to 5 minutes before putting it up.
7. Apply the headliner material to the surface.
8. Admire your handy work. ^_^
I don't have much in the way of pictures of all this because it was a two person job but it's pretty straight forward. Don't let my little 8 step program fool you, it's NOT a easy thing to do. It took Richard and I two days to do ten pieces. I still have two more in and around the closet and head areas to complete next weekend. Total cost for this project comes in at about 100 bucks including all the sanding disks. I don't even wanna know what a headliner shop would of charged me. I still need to add in the curtains, the rods, shelves etc to the interior but this was the last really big interior project until she goes back into the water and the electrical system gets a overhaul. (installing the solar panel etc)
I know you want to see the befores and afters so here they are. I'm very proud of how this turned out, even being a perfectionist.
Before: looking at the quarterberths.

After: Quarterbeths
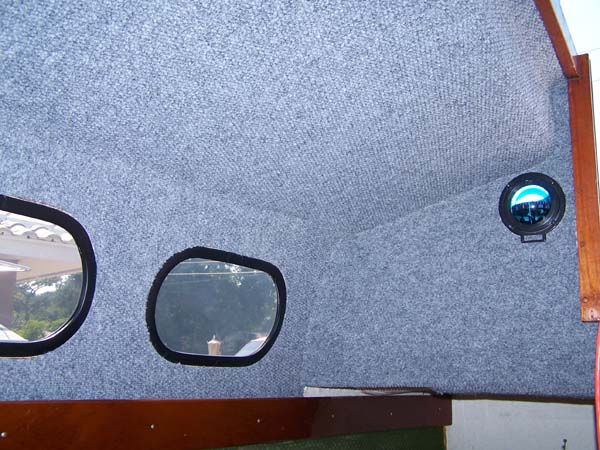

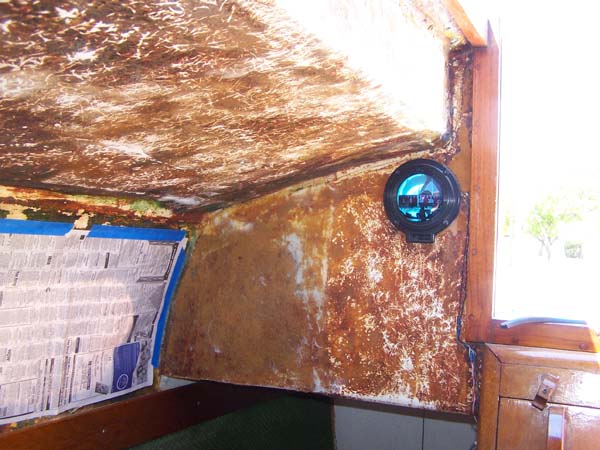
Before: Looking Aft

After: Looking Aft

Before: Looking Forward
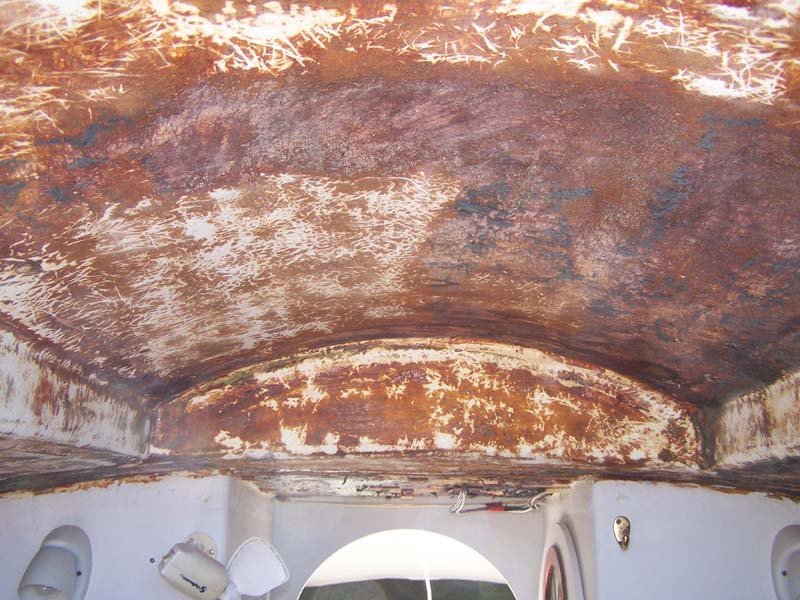
After: Looking Forward

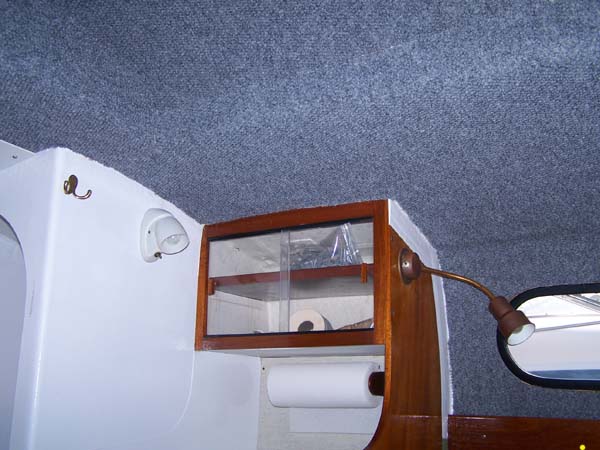
After: Port and Starboard looking Forward

That's about it for this weeks post. This was also the last major interior work that needed to be done. I still have about 1001 smaller projects that will be worked on until we launch her in August. I'm probably going to back off the update posts to every other week until late summer because there won't be as much to share with you all and I'll condense it down into bigger posts so you don't get bored. But you never know, sometimes I get a flurry of ideas and do multiple off topic posts in a week. If any of you have questions about what I did or how I did it, please feel free to comment and leave a public email address and I'll write back to you.
Until next time, Fair Winds....
posted by Jammer @ 10:09 PM
![]()

6 Comments:
Once again, great job. It just amazes me what you have done.
Wowsers!
Those are the most compelling before and after sets that you have done so far. The color of the carpet is very pleasing to the eye over the white of the walls. The porthole interfaces look great.
It was worth 2 weeks of waiting for an update.
Brolly
Hey Jammer, just wanted to say that the headliner looks great! I give you props! I've been checking your site everyday for updates, looking forward to the next! Take care buddy.
Sloth from livingaboard!
Wow, all you guys left comments while I was at work today!
Abqjude: thanks again for the kind words, the project has come so far from when I started it's hard for me to believe she's getting close to being recomissioned already.
Brolly: I know who you are man. ^_^ Your busy with family matters right now, but if you get the chance drop by so you can see it all first hand.
Sloth: Long time no see and thanks for dropping by!! Did you buy that sweet Pacific Seacraft you had your eyes on?
Jammer
Looks a good job.Have seen various boats;but putting up interior lining really puts me off!!!How is it with the sun shining ,doyou have ant isolation material.All the best.
Hi Andrew,
Putting up this headliner was the 2nd worse task I've had to do. Only sanding the bottom was worse although Rich might disagree with me on that.
Nope, don't have any isolation material behind the carpet and I'm not worried about it. ^_^ It would just add another level of complexity to the project, and I'm trying to minimize that. I'm very pleased with how it's working out so far.
Jammer
Post a Comment
<< Home