BeBop Around The World

Even though the trip has been called off, I'm leaving this site up to read for anybody interesting in refitting a boat or sailing in general.

Tuesday, December 27, 2005

Midweek Update....

I have a little update today as I took my last vacation day of 2005 and did some more work. I won't have any more pictures to share until next weekend, as most of what I did was more prep work for painting. I know I keep saying I'm going to paint this weekend then something happens but that's the way it goes....but it seems to be working out better by holding off and not rushing it.

First thing this morning, I did what I was dreading, that's go down to the tax collector's office and legally title BeBop in my name. Dread? Yes. They raped me for $276.56 for tax, tag (vessel id number in this case), and title. They didn't even give me a kiss. But it's out of the way now, something less to think about and lose sleep over. After hitting Home Depot to pick up some caulking and silicon, the day really started.

First, I sanded down the opening cover in the cockpit that I had bonded closed two weekends ago. It's on there now for sure but you can still make out the seam a little bit so I decided to hit it again with some fiberglass and micro fiber. I'll sand it again before I prime the cockpit...heh...next weekend hopefully.

Next I addressed the newly installed ports by injecting some silicon into the areas where the two pieces of locking gasket meet. I used a modified turkey injector filled with clear silicon. Necessity is the mother of invention they say. It looks like it worked real nice, but I'll have to wait until I wash her or it rains again to know for sure. Tracking down leaks is such a pain and it never seems to end. It's funny how human beings can make a house that doesn't leak but it's nigh impossible to do it with a boat.

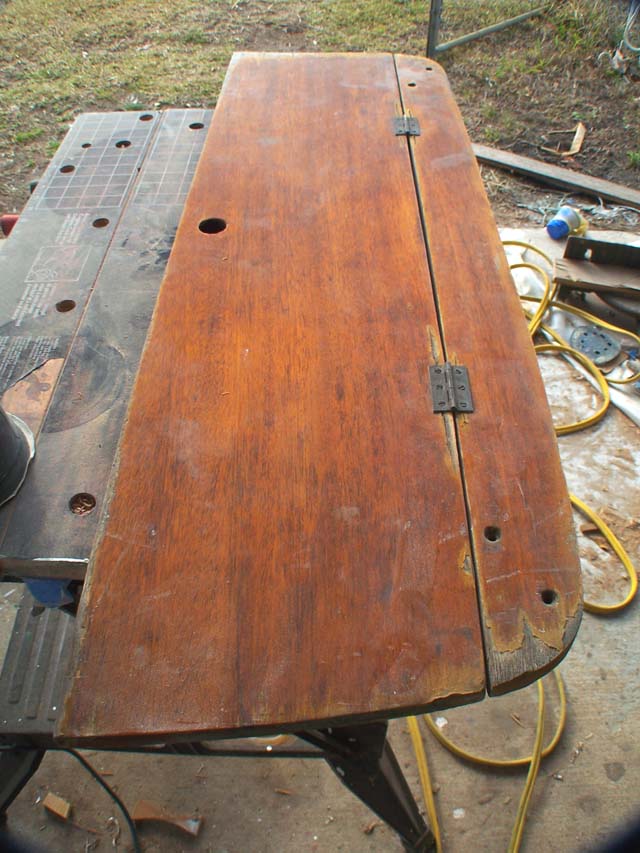
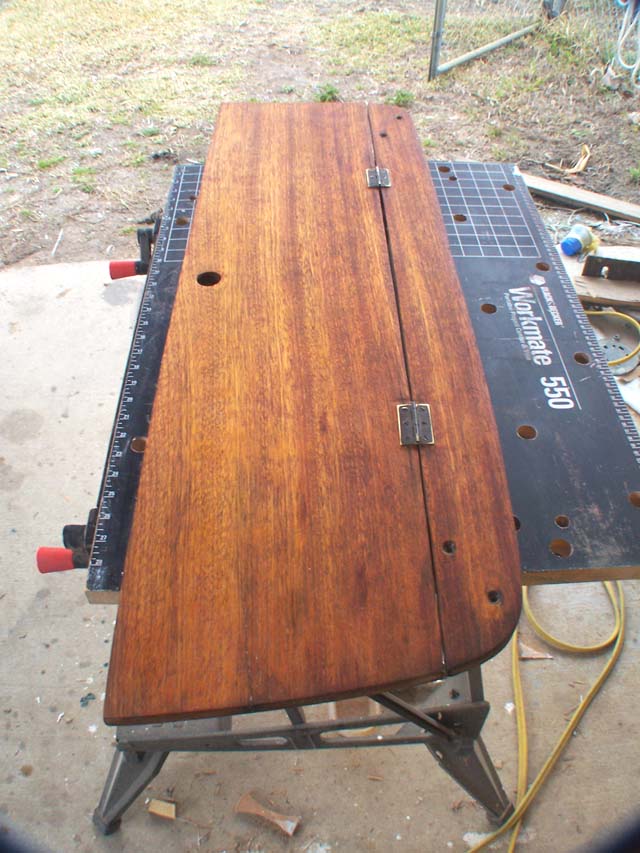
Once the ports were taken care off, I actually managed to paint something. Repeat...I actually painted something. The front hatch was blue to match what color the hull used to be so I took the opportunity to paint it sea green to match the recently completed companionway hatch. It will need a second coat but it's cool how the little things add up. It's great to seem them both match now. Big difference.

The last project of the day was caulking the top of the rub rails where they come in contact with the deck. The old caulking was removed when I refinished them about 2 months ago and needed to be replaced before painting the topsides. I felt it important to do this before we paint so when it rains the water won't run down behind the rail and straight onto the sides below the rails causing staining. This way water will hit the rail and run off like it's supposed too. Caulking is a (very) messy job so I'll have to hit the rails again with some light sandpaper to get it off in a few spots but this is nothing to worry about at all. I knew that after all the topside work for the past 2 months this was gonna happen and they need a little TLC.

That's about it, I got alot accomplished today even if it doesn't sound like it. All these things where nagging little jobs that needed to be done so I did them. Rather boring for you to read about I imagine but honestly.....I really think I just might get the decks primed and painted next weekend. The weather forecast says mid 70's with a minimal chance of rain. It's also a 3 day weekend for me because of New Years Day. The plan on Saturday will be to finish sand the cockpit , paint coat number 2 on the forward hatch and at the very least cut in all the deck hardware with primer. Sunday will continue on with painting. Even with a 3 day weekend the deck won't get completed because we have to add in anti-skid in some areas for a total of 4 coats instead of 3 for the other areas...so 2 weekends minimum....3 is more realistic, 4 to 5 weeks if you throw in painting below the waterline. I should add in here that my best friend and major helper on the project Rich, keeps making fun of my estimates because it always takes twice as long. He's probably right.

Next time on BeBop Around The World....lets try this again.....BeBop gets a Facelift Part I........we hope. ^_^

Saturday, December 24, 2005

A Christmas Eve Port Story....

Alright, made some more progress on BeBop today, I put in half of the new portholes. Originally I wanted to do the painting first, but the weather just isn't working with me. It's been cloudy, cold and rainy on the weekends with mild temps and sunny while I push a desk during the week. So to keep the project moving I'm doing this 1st and will just put up with the extra hassle of taping them up when I can finally paint.

Ok, here is a picture of what the ports (can see the old rub rail too..yuck!!) looked like when I bought her. The rubber locking gasket was in horrible condition, the chrome lock piece wasn't chrome anymore and the ports had become opaque because the previous owners had used ammonia based cleaners. It really hurt the eyes to look at this every day.


Now, I really wanted to replace them with 8" inch round opening portholes but they cost about $150 a piece. So $1,200 to replace them all. If you've been reading my blog every week you know that kind of money is just not available to me. Don's Marine didn't have anything that would work either. Replacement was the only option on the table really. All the material cost to do this is around $280. This includes 50 feet of locking gasket, the lock strip, the gasket tool and eight pieces of 1/4" 12x24" smoked lexan.

I started by taking out the old ports and lightly sanding around the area, then using the old lexan ports as a template for the new ones. Now the problems started of course. The new gasket was a very close match to the old one but it was slightly thicker so we had to make adjustments to how we cut out the new portholes. I used my jigsaw with a fine tooth blade for this task. It's not that hard to do it accurately if you take it slow. After about 2 hours figuring out the 1st one because of the gasket issue the rest weren't so bad. The hardest part was putting them in. Besides swearing a lot it's definitely a 2 person job..Enter my friend Rich. For each port, I would be in the boat holding the gasket in so Rich could push the new port in. Sounds easy right? Nope...if you've ever tried to replace a bicycle tire think 10 times hard than that..plus you don't have to fabricate new rims. Once you get a feel for it you realize it's not a impossible task, but there is a lot of muscle involved. Here is a close up of one of the newly installed portholes...nice and shiny with a reflection of Richard in it.


Now nothing comes without a price right? This stuff has it's downsides too. For starters it's not as tuff as round stainless steel portholes through bolted to the sides and poses more of risk in heavy seas of getting stoved in by a freak wave. Now they can take a blow, Rich was trying with all he had to push them in after installation and they didn't budge...But I'm planning on carrying a few pieces of emergency replacement lexan anyway and a clever way to cover up to 4 portholes if they get knocked out underway in a gale so I won't sink. Another issue is fit...they are in but not perfect..well yet...I think. It's sorta like when you get a new windshield installed they leave it taped in and say don't drive it in the rain or wash it for a week cause it's settling in. Same thing here....(I think.) When sprayed directly with water the 3 of the 4 damn things leaked a little!. I am flabbergasted. I'm (really) hoping it's the settling in factor...the installation guide says the gasket shrinks a bit so install them with extra material and I did. The absolute worse case senario would be they don't settle and continue to leak. I would then have to buy more lexan and bolt it directly to the outside and seal it with 3M 5200..but it wouldn't look as nice and if I do this after I install the new headliner, I would get to replace half of that again too. Not happy about that....once again I think about that guy from Argentina with the open dugout canoe...he didn't even have a cabin much less a leaking porthole issue. I'm luckier than he is right?

Finally, people who read my blog are asking for a picture to show what she currently looks like so here it is. The new ports leaking or not make her look ALOT better.


I'm taking Christmas off tomorrow. Monday weather permitting the other 4 ports will be installed on the starboard side and with a little luck perhaps I might be able to do some painting on Tuesday if it gets warm enough.


That's it for me today ladies and gentlemen. My wrists hurt (titanium pins) from pushing on the gasket so hard today, I can pick up stuff fine and pull things ok, but a pushing action on my right wrist or twisting action on my left really hurts and I can't do it anymore. I work around the problem. Typing is getting to me now, but I enjoy sharing my experience refitting BeBop with everybody so I put up with it. Hope you all have a Merry Christmas wherever you may be in the world, free from pain or worry...if not...just drink some (spiked) Egg Nog. ^_^ hehe, that should do the trick. Peace to you all.

Sunday, December 18, 2005

Rain Delay....

As I feared last week, I got rained out this weekend. I really wanted to get BeBop primed up but mother nature rarely cooperates with sailors it seems. I did manage to accomplish a little bit this weekend though. I sanded down the rear cockpit locker cover and teaked it so it's ready when the painting is done. It was surprisingly difficult thing to do and it took about 4 hours. Below is the before and after. It took ten 60 grit sanding pads for the project. Yes, teak wood has some very unique properties..chews up sandpaper too.


After completing the cockpit locker, I used some bronze wool to take off the minor surface rust and grime on the dodger frame. It still needs another going over but it should work fine when I put it back on and get another dodger made money permitting. I put the last missing piece onto the back part of the companionway hatch today too. I finished painting it during the week. I also put another piece of weatherstripping onto the front top companionway hatch in hopes of reducing the amount of water leaking in. It's been raining WAY too much recently for the dry season in Florida. While inspecting the interior, I discovered that about 2 inches of water had run down into a small six inch locker amidships. Didn't hurt anything, I sponged it up in about 5 minutes, but considering I'm moving onboard that amount of water leakage is unacceptable in the future. I suspect that with the dodger on it will reduce a lot of this. I know it won't be completely stopped until I move onboard and I can see the slowly leaking areas. Then I can repair them one at a time until it's 100% dry in heavy weather....not 99% like it is right now.

Well, to summarize, I have all the materials gathered and I am ready to do some serious painting. Have about half a day's worth of sanding left to do in the cockpit before I tape everything up and prime her. I have 4 days off from work coming up so confidence is high that this will happen over the Christmas weekend. The lexan sheets for the new ports also arrived on Friday so all the materials for that project is now on hand. Just need some clear skies, no wind (haha!) and a temperature over 55 degrees so the paint will dry. Until next time...Fair Winds...(and dry weather to you.)

Sunday, December 11, 2005

The Current State of Affairs.....

It's been a strange kind of week here with more than one project that's underway so I'm going to try and give you a broad overview in this update. No pictures because it pretty much looks the same as last weekend. Lets start with BeBop's current exterior status:

Decks: Mostly sanded....looks like crap.

Hull down to the waterline: Completely sanded...but looks like crap.

Waterline down to the keels: Blisters popped and sanded....really looks like crap.

Cockpit: Needs another days finish sanding, is stripped bare and just looks plain crappy.

But hey, those rub rails look real sweet....

Ok, BeBop isn't going to look much worse than this...if it could be stripped we've pretty much done it. The only thing we didn't take off was the deck hardware and that's because we haven't detected any interior leaks comming from it. I am getting some water leaking in from around the companionway hatches when it really get rainy and windy but I think I have a plan to tackle that. All in all it's pretty watertight considering it might of gotten 1 or 2 cups of water inside and we've gotten like 2 or 3 inches of rain this week. Made for a nice test of what's working and what needs to be weatherstripped.

Saturday was another killer day sanding on the keels. Rich and I sanded until I thought I was going to become physically ill. No kidding really. Around 2 pm after weeks of sanding it just kinda came up in a rush and I had to stop. Of course it could be heavy metal poisoning from the bottom paint too. Tuff to say...in any event the decision was made that the bottom after 20+ hours of work is as ready as she's gonna be for paint.

Sunday was really a wash out. I didn't get up early cause I felt so bad after sanding yesterday. I really think the compounds in that anti fouling paint have started to build up in my system even wearing a mask. Some things were accomplished though. I've bonded down the only opening seat cover in the cockpit for safety reasons. It doesn't prevent you from reaching anything...no idea why the previous owners made that modification. Before the rain started comming down Rich built another sawhorse and we decided to move the mast from on top of BeBop to the backyard. A couple of different reasons went into this. 1st, I kept hitting my damn head on it whenever I was on deck for any reason. 2nd, when we paint we don't want it in the way. 3rd, it will itself need to be painted and have some other work done to it in the near future. During the process Rich threw his back out. It was messed up though..you'd usually think of doing that while holding a heavy object but I was the one holding the mast by myself (quite heavy I will add) while Rich was moving the sawhorses. Go figure eh? Anyway Rich, I hope you recover quickly sir and thank you again for your continued help.

I've also started to paint the wooden pieces that will go back into the bottom of the cockpit. It's a dull and boring thing to do....so I won't be dull and boring with describing how the paint is drying. But it's important to fix it so it won't rot.

Now that you've read what was accomplished this weekend, let's take a step back.

First off, I'd like to mention that I wrote Lauri G, who is currently out cruising and not sanding....lucky bastard :-) ....a email earlier in the week and he responded back to me. Very cool eh? To think I got a email back from a real cruiser I hold in high regard. If you haven't already done so I'd check out his website and stories. I have the link on my blog.

While I was doing overtime at work on Friday, Rich jacked the entire boat up by 4 inches on the trailer so we can paint the very bottoms of the keels when the time comes. Using my 10 ton floor jack and the innovative use of a couple pieces of 2x4 he raised it by himself and without my permission. Of course if he damaged BeBop I would of had to kill him. But he didn't cause she's a tuff little boat and it makes working on the hull a little easier. Being a conservative type of person I don't think I would attempted this by myself...which is why he probably did it while I was at work. I'd like to interject that I've known him for about 16 years now and it takes about that long to trust somebody enough to jack up your sailboat...no....my entire life right now.....without permission.

I've put in the order for all the new gasketing materials (for the ports) from Austin Hardware and Supply and it has arrived. Nothing but respect for how they do business...very prompt and professional on the phone..shipped out the same day etc. If you ever need to order locking gasket this is about the only place you'll be able to find it on the net. Other shops have it but will only sell to other businesses. I've ordered up eight, 1/4 inch bronze lexan sheets from Modern Plastics that will be used to make the new windows too. They shipped out the same day I put the order in and should arrive later in the week.

So to recap, BeBop currently looks like she got into a fight and lost big time, I've got heavy metal poisoning and Rich threw his back out. Assuming we all survive ok and weather permitting, the coming month should be very exciting and nerve racking for me. BeBop will be getting primed up next weekend and the old ports will be ripped out. Following that, Christmas weekend will be more painting and possibly putting in the new ports. I estimate it will take between 3 and 5 weeks to get it all primed and painted. I have it all pictured in my head perfectly, I just need some time, good weather and a little bit more money to get it out here into the real world. There's still tons to do even after she's looking bristol on the outside so don't think the refit story is close to being over.

Next week on BeBop Around the World...er...weather permitting.....BeBop Gets a Facelift Part I

Friday, December 09, 2005

Sailboats and Spaceships...

From time to time random thoughts give way to coherent ideas. As I write them down, I will post them inbetween the updates of what I'm currently working on with BeBop. I'll give a update on what was accomplished over the weekend in a couple of days. Until then here's some brain food.

Sailboats and Spaceships have a lot in common. Think about the following two sentences:

Scotty: "She can't take much more Captain! The ion storm is causing fractures in the dilithium chamber!"

First Mate: "She can't take much more Captain! This gale is causing fractures around the mast step!"

Not much difference is there?

Sure I could of used a more terrestrial comparison using say a example from the Apollo 13 mission but I think you get the idea. Both have to endure the worse of conditions and safely deliver their crew to their destinations.

Up until the invention of the steam engine in the 19th century being a sailor on the seven seas was the final frontier. Now with modern technology comes transistors, plastic polymers, computers and rocket propulsion that allows a select (and very lucky) few the chance to leave terra firma for a journey into space.

We have to be little miniature worlds unto ourselves while we travel. To start with, we both have a propulsion system and a means of generating power such as solar panels. We have batteries to store that power. Each must carry enough food and water to last for the entire journey. A navigation system is required as well and a basic way to repair the ship underway should it be necessary. Communications are very important in case of emergency. Entertainment is required to prevent boredom and depression such as good books and music to listen to, but a keen sense of adventure in my opinion is the most valuable thing of all. A willingness to make the journey so to speak.

The similarities don't stop there. Water tanks play a important part. On a spaceship all the water onboard is typically recycled over and over again and on a sailboat they can replentish supplies via a rain cluster or storm but it's pretty much the same if you think about it. Waste disposal work in a similar fashion. Astronaut's just jettison it overboard in much the same manner as sailors. (3 miles or more offshore mind you) If you need to leave your spaceship for a short period of time, you wear a spacesuit with a maneuvering pack vs on a sailboat you take the yacht tender with a engine on it. Both carry GPS as a primary means of navigation with a sextant as a backup. Yes that's correct, even on the space shuttle you can use a sextant to determine your position in space. Bet ya didn't know that. As you can see there isn't much difference afterall besides the fact you don't have to drag oxygen around with you on your boat!

To many people such as myself a sailboat is their last frontier. A final dream to be lived. Not I, nor anybody I know will probably ever be able to take a trip to the moon on a spaceship but right here on our little blue sphere I can take a trip to a far off place in my sailboat. Sure you could get on a jetplane and be anywhere in the world in under 16 hours- a trip that would take a fast sailboat 6 months but sometimes it's about the journey, not the destination. I guess it could be said sailors are the sea based astronauts of earth, traveling from place to place on our miniature spaceships. Just looking to discover something about ourselves and maybe have a grand adventure along the way.

Saturday, December 03, 2005

BeBop's Strip Tease Part II

It's time to mention again how much I love sanding. Actually I'm just kidding. But 4 out of 5 sailors agree they spend more time sanding their boats than sailing with them. This weekend is being spent sanding from the waterline down to the keels. Words cannot do justice to what a messy job this is. Well maybe a pig farmer has me beat. Sanding above your head and in the enclosed areas between the keels is extremely messy and tiring. I look like a blue smurf when I get out to take a break.


I don't plan on taking it down to the fiberglass in all the areas, just sand it clean. Unfortunately while I'm doing this, I'm finding some blisters on the very bottom of the hull. I thought I got lucky when I bought her but none the less she has the typical Westerly osmosis thing going down. It's a minor pain to deal with but rest assured dear readers that no boat that I know of has ever sunk from blisters. So far nothing bigger than about a quarter piece in size has been uncovered which should make repairs relatively easy even though it will push out the schedule by a week or two. Because I'm sanding more than planned, I'll probably end up with a primer/sealer coat after the blister repairs are complete instead of just adding new anti-fouling paint.

Just a quick note...It kills me to see BeBop looking worse and worse not better and better. I know it's all needed prep work and in another month or so it won't look like the same boat...it will look a lot better than when I bought her for very little money spent. But right now...well you get the idea.

A word on Coastal Marine and Fed Ex...

They both suck. I received my paint on Tuesday and discovered FedEx was nice enough to try and paint my porch in white. There was about a quart of paint on the porch from were the driver must of dropped the package. They claim it must of been leaking from the start but I find it highly unlikely that it made it down from Maine and suddenly decided to take a quart leak as it was being delivered. Face it FedEx....your driver dropped the damn thing and it started to leak right then and there. I've been painting various objects for years and have never seen a factory sealed can pop a top. So, to shorten up the story a bit, I've filed a claim with them for the damage to the porch and the destruction of a nice pair of workpants. I'll be faxing them the bill right after I get the required two estimates to repair the damage. The $80 a gallon paint they say is Coastal Marines responsibility. I'm out about half of what I paid for in material cost. It took them 4 days to ship it, didn't mark the package as fragile with a sticker to indicate "this side up", (always recommended with a liquid) and put it in a anchor box surrounded by newspaper. Oh yeah, a real pro operation taking place there. Think I'll stick to West Marine and Defender for my goods from now on and I'd advice you to do the same. (End Rant)

I know this weekend was just incredibly exciting with me pretending to be a blue smurf and all. I tell ya....what I'll do for an audience. Not sure at this point what direction the schedule will take next weekend. Weather permitting the topsides might get primed or repair the blisters on the bottom is a more likely option. Just have to check in next weekend and see how much more damage I can cause. :-) Until then...Fair Winds.....