BeBop Around The World

Even though the trip has been called off, I'm leaving this site up to read for anybody interesting in refitting a boat or sailing in general.

Sunday, November 27, 2005

BeBop's Strip Tease Part I

Man am I tired after a full weekend of working on BeBop. My hands have a bluish stain to them, my fingerprints are sanded off and they are mostly numb from running the orbital sander for about 12 hours but I'm 90% done with the above waterline areas that need to be painted now. For my 2.5 viewers you know from previous posts what BeBop looked like with the blue hull. I really didn't like that so it had to go. Besides in the tropics that would make the interior like an oven. Investigating the cost of marine strippers I didn't like what I found. They were trying to sell the stuff for about $50 bucks a gallon because it had the name "marine" on the bucket. Ouch. So off to Home Depot I went to see if I could find anything cheaper. I discovered a product called Citristrip. Safe for plastic and no harsh fumes, I picked up 2 gallons for $18 bucks a pop and came out like $60 bucks ahead. I also picked up some cheap plastic sheeting to cover the areas to be stripped so it gets maximum staying power. Here is a picture of what BeBop looked like with the 1st coat of stripper applied and the plastic sheeting on.


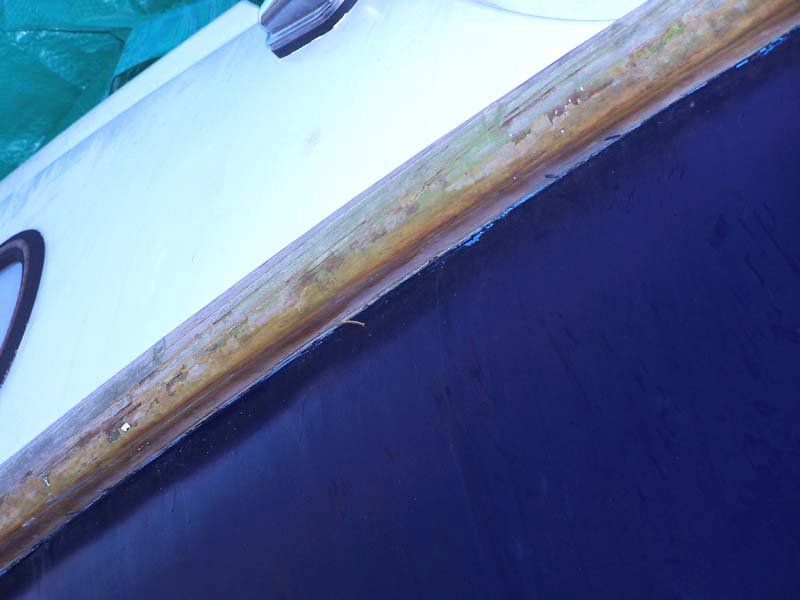
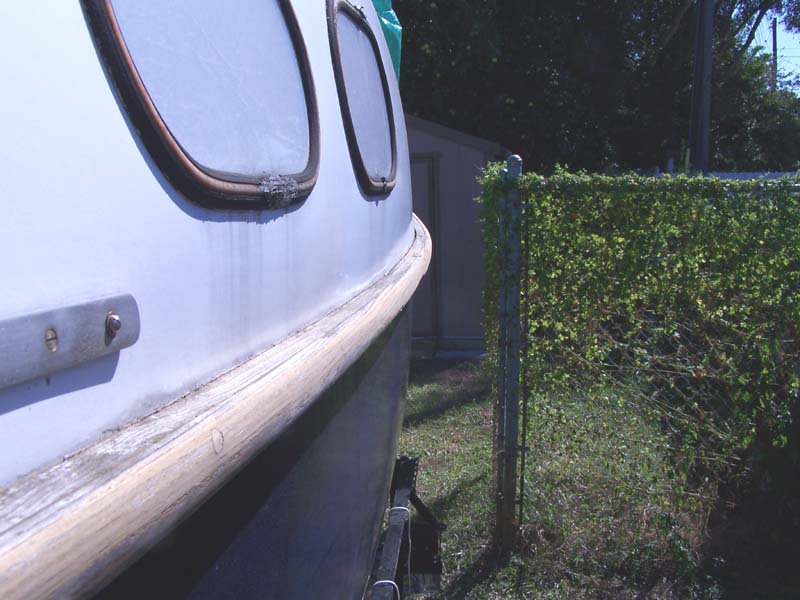
Now I thought this was going to be cake. Hahahaha!!! Absolutely wrong! BeBop is a 37 year old boat and I don't think she was ever stripped down to the gelcoat before. It took me 3 coats of Citristrip applied every 30 minutes to get something close to what you see below. I tried keeping it on longer but it didn't seem to make a difference on how well the stuff worked. To make it more interesting it appears that somebody in the past painted above the waterline to the rub rail with anti-fouling paint. Anti-fouling paint totally laughs at stripper and the stuff is sandpaper's worst nightmare so we could only get it to this point before having to used the orbital.


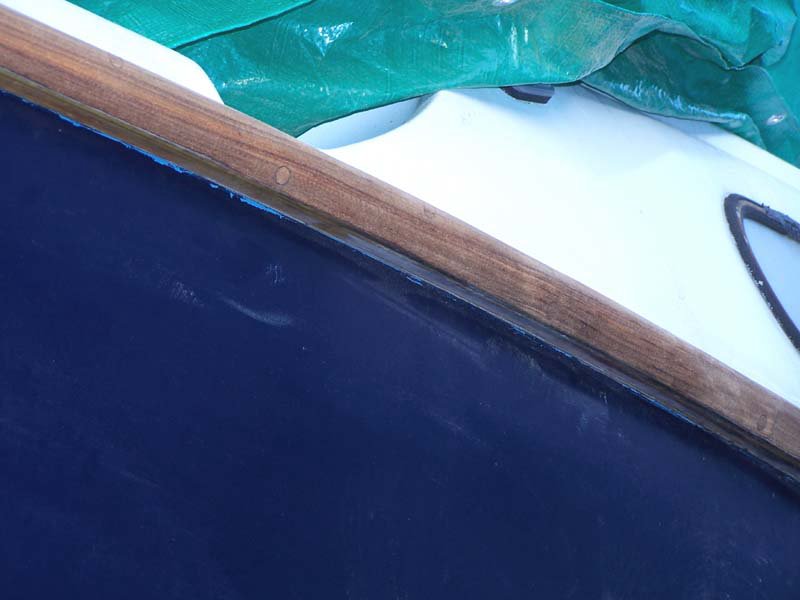
Sweat equity time. I quickly learned that you have to wait for the sides to completely dry or you'd just load up the sandpaper with paint in about 10 seconds. During the time I was initially stripping and waiting for the washed off areas to dry I did some work on the yacht tender to fill the time, but I'm saving that story for a slow weekend so no details for now. After the sides dried out enough to sand, I used the Dewalt orbital with 220 grit on it to take off the final paint covering the gelcoat and I used roughly 50 sanding pads. I'd like to interject here that I'm very surprised my sander hasn't died yet. I've used it to rebuild my old cafe racer motorcycle, 1 homemade sailboat Rich is making, 1 yacht tender, many numerous other smaller jobs and now about 400 square feet of gelcoat covered with some nasty stripper resistant paint. If your going to buy a orbital sander do yourself a favor and get a Dewalt. They should pay me for the free advertising but I stand by a excellent product and smash a bad one.


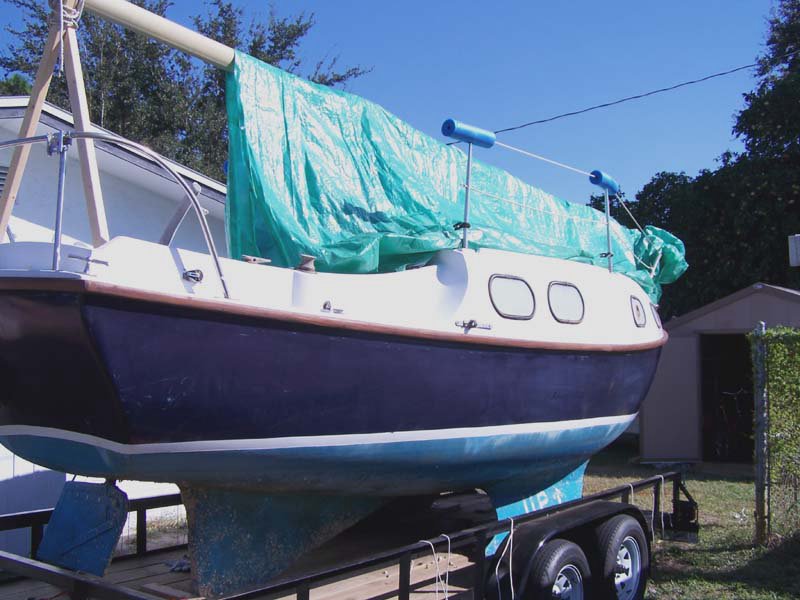
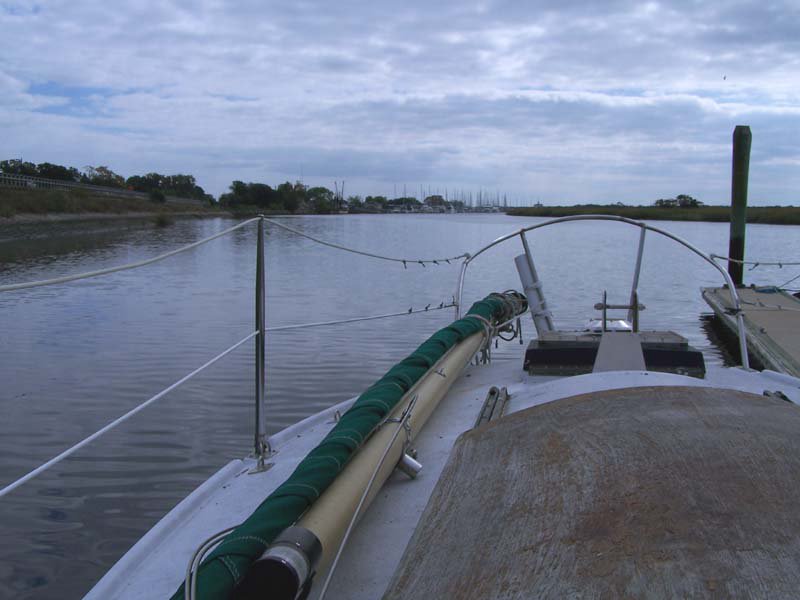
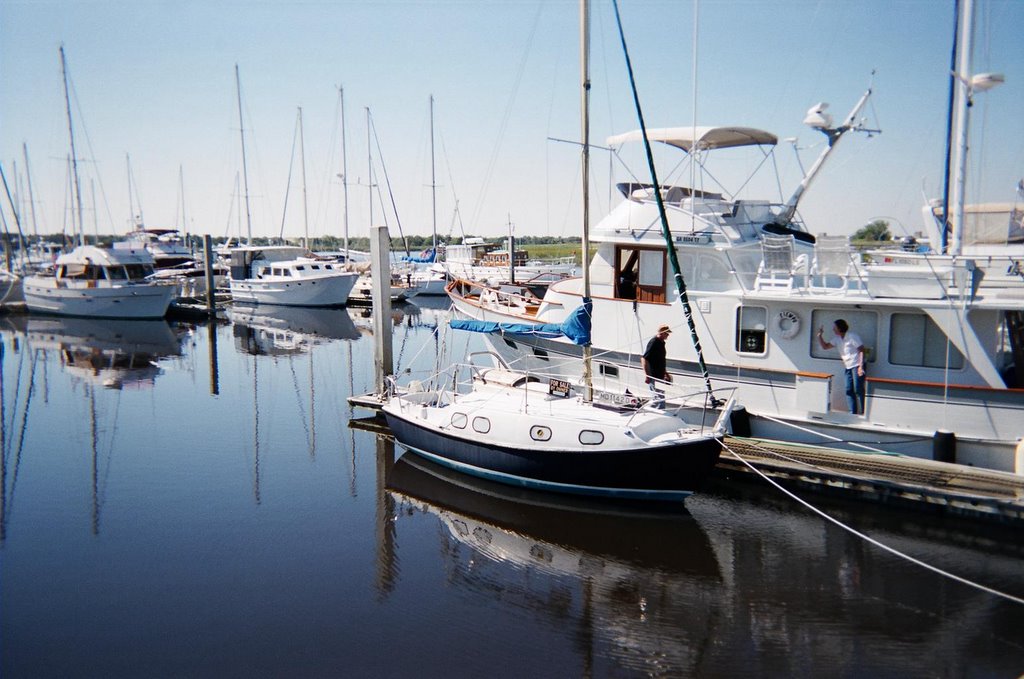
Here is my last picture with how BeBop looks now with all the blue paint off the sides down to the waterline. Wow, that was hard but she's beginning to look closer to what I had in mind. I'd like to put in a hearty thank you to Rich for helping me put on the stripper and plastic and working on the dock bumpers too. I figure when he gets his boat I'll be spending my time helping him on his refit as payment.


Sanding all this down generated a crazy amount of dust. I think I'll spend the next weekend sanding the waterline down to the keels so that when I paint and prime the topsides I won't get dust all over freshly painted areas. The bottom won't be going down to the gelcoat because it's not necessary imho. There are no blisters and the paint was designed to live in a saltwater environment so I'll just sand it clean for the next coat. Now dear reader I must get some sleep. I have body parts on my body parts that hurt after this weekends work.

Next week on BeBop Around the World: BeBop's Strip Tease Part II

Monday, November 21, 2005

And Behold! The Hatch Story.....

As promised here are the pictures of the companionway and the story that goes with it. I mostly consider it a success. It certainly looks better than before but more work will have to be done in the future to improve upon it. I'll explain later. To start with here is a picture of it before I had even bought the boat. Repairable certainly but it was rough.


Two weekends ago the hatch came off BeBop for repair work. It was in real bad shape. The trim pieces on both the front and back needed to be replaced and the teak veneer was worn thru in a couple of places. The cost of a new 4x4 piece of veneer would of been about $150 before shipping so it was decided after repairing it to paint it in the matching trim colors. The money saved could then go to other projects and it should still look ok. The trim pieces could not be bought directly and would have to be fabricated and bent into place. In addition to that, the hatch cover where the washboards were supposed to meet had about a 1/3 of inch gap that had to be fixed too. So the one weekend project becomes a 2 week project.

The first weekend was spent sanding it down and creating the new 1/4 inch half round for the front and back trim. I picked up 2 pieces of teak that I thought would work for 9 bucks earlier in the week from Don's Marine, but it was too stiff so we had to create a steamer to facilitate bending the wood to shape. I was skeptical at best that would do the trick but in the end it worked ok. Rich and I had to build a poor man's wood steamer and the invention was creative to say the least. We used a turkey deep fryer with a retort on top and connected that to a hydraulic jack handle. Yes a hydraulic jack handle attached to a turkey deep fryer...you can die in peace now that you've heard it all. Should of grabbed a picture of that setup, told ya this is a low budget operation. The deep fryer was used to heat the water to the boiling point where it entered the retort and was directed into the jack handle where the piece of half round was kept for about 1 1/2 hours per piece to reach a point were it could bent enough to be nailed into place. The 1st piece was destroyed because we didn't steam it enough and we tried too hard to bend it into shape....crack!!...chalk it up to the learning curve but we got the other pieces steamed and put on without too much hassle.

The 1/3" gap where the hatch cover and washboards meet was corrected by laminating 2 pieces of 1/4" marine plywood into place with some 404 micro fiber mixed with fiberglass resin. This added 1/2" to the front hatch/washboard area. The hard part was getting the pieces fabricated so they fit just right and bending them into position while they setup. This was done with a couple of 2x4's and a 25 pound weight as shown in the pictures below. When I build the new washboards in the future this will create a even better seal than now.


All during the following week before and after work a combination of gorilla glue then 404 micro fiber was used to fill in gaps and seal up areas that water had penetrated from years of exposure to the sea. Priming consisted of 2 coast of Interlux Pre-Kote, one per day and sanded the following morning then 2 coats of Interlux Brightsides Sea Green. I'm going for a white with green trim look. That ways it matches the cover on the roller furler and I think it's fitting since the boat was made in England. Here is the finished result that I put back on this morning....it's hard to see the painted hatch cover in this picture because of the green tarp across the mast but I think you can get a feel for what's been done.


I'm fairly happy with the end result. After putting weatherstripping into place it should be a big improvement over how well it battened down before. I still want to replace the washboards time permitting later on next year. The paint job on the hatch cover I'm just so/so with. I'd like to interject that I'm a perfectionist so while I'm sure you'd look at it and say offhand it's great, I see all the little imperfections in it because I built it. I think it will get the job done and looks "ok" but it's not like new for sure. Money being the major constraint here I have to make due the best I can. Hell, compared to the guy who sailed a open dugout canoe across the pacific ocean it's fantastic...and I try to keep reminding myself that every time I doubt my work.

It's back to the grind for me until Thursday. Hope to finish up the prep sanding for topside priming and paint this weekend before the turkey browns. Until then...fair winds.

Sunday, November 20, 2005

Sanding is oh so much fun......(or not)


This weekends goal was to finish up the hatch and sand the topsides in preparation for painting next weekend. The hatch...is taking longer than I thought it would but it's nearly done. Hopefully I'll have pictures and a paragraph up about it in the next day or two. Sanding the topsides was oh so much fun. (or not) I started Saturday by running out and getting more sandpaper. I went with 60 grit on the orbital sander to knock down the main areas and then switch to 220 for the final pass. Then for the areas that a orbital can't get to...and there are a lot of them...it's basically the same routine but by hand. Man are my arms sore right now. It might be a small boat for some people but that's a hellava lot of sanding I just did and it's not quite done. I'll have to hit the cockpit again in the tuff to reach areas with 220 by hand on my next day off. The portholes will have to come out right before the final sanding too so when the new gaskets and ports are installed hopefully the following weekend, they will be a good fit over clean fiberglass. That's the part that worries me. I don't like having open holes in BeBop so critters can get in. I'll tape them up good but it would still be like cutting a few holes in your roof for 2 weeks and leaving a tarp over it. Yep, it makes me nervous.

Sunday was a rehash of Saturday with a little bit of metal polishing thrown in. I was told to use bronze wool instead of steel wool for cleaning the stainless steel so you don't embed it into the steel and get rust spots. Makes sense and I'm taking the advice to heart. I also stripped off all the old riggers tape from the lifelines and cleaned them up some too. I think I'll probably end up taking them off and soaking them in bleach for a few hours to get them totally clean from stains, then coat them with a lithium grease for protection. Later in the day Rich pitched in and cleaned out the cockpit compartment for me while I swabbed down the decks to remove the sanded material. Then as a finale, I reoiled the teak rub rails because they were really dirty from all the sanding as you can see in the picture. I was literally covered in the stuff. Yes, yes, make fun of the monkey boy wearing the mask but it's better than having breathing problems. Ah what a man will do for his boat.

I made the mistake of ordering the paint I'm going to use online to save twenty bucks when I should of just bought it at West Marine. I don't think it will be here by next weekend. Still mad at myself about that since time is a factor and I can't waste a single day. But I guess the worst case scenario would be it doesn't arrive and I'm forced to do 1 of 100 other things that still have to be completed by the summer. Work on completing the yacht tender and stripping that god awful blue paint off the sides will be what I'm doing next weekend sans deck paint. When it arrives it will be a 3 day job minimum to paint..1 day per coat. 1 coat of primer and 2 of the paint...and yes you have to sand twice in there. Like I said.....sanding is oh so much fun. (or not)

Next time on BeBop Around The World: The long awaited completed hatch project....

Sunday, November 13, 2005

Let the Refit Begin....


After a week at work I couldn't wait for the weekend so I could get started on the refit. Saturday morning after breakfast Rich and I hopped in the car and headed over to West Marine to pickup some supplies for this weekend. Teak Oil, Paint, Bungs, Brads and lots of sandpaper were on the list plus a few more misc items. The goal for this weekend was 1. Refinish the rub rails 2. Get the outboard running. 3. Work on the teak that makes up the companionway. I would say 1 and 2 was completed and about a third of number 3.


1. Refinish the rub rails was a complete success. I am amazed at how much better they look. Even the neighbors were impressed. I know there are many more important items on the boat that need my attention (like the paint and ports) but I wanted to start out with a small project that I was pretty sure would look nice and give a positive start to the entire venture. The former owner I guess trying to cut a corner with maintaince, covered the rub rails with fiberglass resin...which of course being exposed to the sun turned yellow then started to crack and peel. Followed was a silvering of the wood. So Rich did a quick sanding during the week and determined yes it was salvageable. On Saturday after getting back home from West Marine I broke out with the Dewalt orbital and some 60 grit. With some assistance from my trusty putty knife the rail was looking much better. I followed the orbital sander by hand with 220 grit. I was thinking varnish for the rails but Rich and Yashi from back in Georgia both said I should go with teak oil instead. Boy am I glad I listen to them. I love the stuff. Just call me a teak freak. If I could teak the fiberglass hull I would. It's cheap, looks fantastic and it's as easy to maintain as running a duster on your furniture.


2. Get the outboard running. I take no credit for this as Rich did all the work. I just bought the new fuel line for it. While I was doing my best to cover myself from head to toe with sanded teak dust, Rich was tinkering with the outboard. I wasn't present for the entire ordeal but it went something like, clean the plugs, fuel filter, change the gear oil, mix the fuel cause it's a 2 stroke, prime the engine and it worked! He was right it was simple fuel contamination. It seems to start consistently now on the 4th or 5th pull. I guess the part that strikes me as being the coolest is the fabrication work Rich did. A piece of the internal throttle control assembly was missing and there was no way to buy a new one. It was a tiny piece of rounded metal drilled with a hole to accept a pin. When you twisted the throttle it slid up and down a groove in the handle to control the engine rpms. Rich fabricated a new piece using a masonry self tapping screw head. I should of had him make 2 so I can just show the other one to people cause it's really neat. So few people know how to really make things anymore. There is still some work that needs to be done, the kill switch is beyond repair and a new one will have to be wired in. Until this can be done simply choking the engine works nicely to kill it. All in all I consider it a success. Just a FYI for the 2.5 people who read the site and are still awake, the picture of the engine is with the cover off, mounted on a engine stand (Rich fabricated the mount for that too) with the throttle assembly off. It looks much nicer in person but I just wanted to give you a feel for the work that was done.


3. The companionway still needs a lot of work to get it up to par. The washboards are sanded and teaked. Told ya I love the stuff now. But there will be a problem. The washboards have been sanded and sanded over the years and are getting to be a lose(r) fit in the slats. They will work for keeping critters out of the inside and will probably work just fine at the dock during the rain too but for offshore work they are too loose imho. I plan on heading over to Don's Salvage Yard in a few months and get some scrap teak pieces and fabricate new washboards from scratch. The companionway frame cleaned up nicely too. The hatch cover is the real story on this project....but it's not done yet so no pictures or the rest of the story til then. This pretty much brings you up to date with the state of BeBop right now. Next weekend I plan to start sanding down the decks in preparation of receiving new paint. Until then.....

Thursday, November 10, 2005

Taking Stock....


After a nights rest, I started early the next morning by taking all the stays, rigging and guide wires off the main mast. I thought it was going to be a 2 or 3 hour project to get it all squared away and then hit the interior later in the afternoon. Heh, little did I know. It took about 2 hours to get all the rigging unknotted and put away then another 2 hours to get all the guide wires off. That was the worst part as I tore up my hands pretty good while getting the pins out of the shackles. About this time Rich woke up and started helping me straighten things up. With his help we made a tall sawhorse to mount the non functional engine on for work and a "A" frame for the stern to hold the mast up off the deck. We took the roller furler off the mast and stored it in the garage diagonally cause it was too long to go straight in. I'd like to interject a hearty thank you to the neighbors for putting up with a HUGE boat next to the house. I was really worried about them freaking out about it.


Sunday and last day before my vacation is over I started taking out everything from the interior. Everything from the cushions in the quarter berths to the sails in the front lockers were removed and inspected. I'm telling ya it was like Christmas. The coolest thing found was a spinnaker in the forward v berth area that was in brand new condition. I bet that sail cost 1/3 what I paid for the boat. The previous owner never said anything about that. Other cool items found was a offshore life jacket, working jib cut for the roller furler, 2 safety harnesses, a depth sounder that's not installed yet and a autopilot for the tiller. I felt like I'd hit the motherload. The gear totaled about what I paid for the boat. But I can't wait to see that spinnaker flying next summer most of all!


After emptying the interior out I took the main sail off the boom and washed it good with dishsoap while my friend tried to get the engine started with no luck. Luckily we found the manual onboard to troubleshoot the problem. The gas looked like milk. We tried changing fuel hoses and using clean gas but it still won't start. It wants to with starter fluid but with bad fuel and hoses it wasn't going to work. A new hose will be picked up this weekend and we'll try again. I don't see any reason why it shouldn't start then as it looks real clean otherwise. The last order of the day was to coat the standing rigging with lithium grease for prolonged storage until the summer.

It was kinda sad knowing that from this point forward the majority of the work will have to take place on the weekend because my vacation is over. Since we are no longer on daylight savings time it's dark in the afternoons by the time I get home. I can still work on the small things like cleaning up the dodger frame with steel wool and doing the research for what kind of paint I want to use on the topsides then write up the blog before I got to bed. But all things being equal I'd rather be working on BeBop and her refit. Believe it or not it's a major stressor to me for a few reasons. 1st, it's the biggest project I've ever undertaken. Before this the biggest was rebuilding a motorcycle 2nd, I don't have a lot of money to do it with and 3rd it has to be in liveaboard condition by late summer. The clock stops for no man. Just do the best I can I suppose, like that makes me feel any better.

Next up on BeBop Around the World: Let the Refit Begin....

Wednesday, November 09, 2005

You meet the nicest people in a marina....

With the newly purchased trailer and my friends truck to pull it we set off at 4:30am to go pick her up. Coffee check, Gas Check, Coffee...you get the idea. The trip was uneventful so I'll spare you the details. I'd punched in the address for the marina into google maps before we left and it led us right to the marina about 40 minutes early. BeBop's previous owner said to call him when we arrived so we pulled into the marina by dock 7 and I pulled out the cell phone and asked what dock he was at. He asked were I was and I responded with dock 7 and he said beep the horn. Go go gadget google. So we beeped and he said turn around and there she was right in the front slip. My heartbeat quickened as I walked up to her and the owner and introduced myself.


Walking back out to BeBop he said he couldn't get the engine running and would arrange for a tow to the haul out. I wasn't really happy with that considering he said the engine ran great, but I don't think I've ever read a story about a sailboat where the engine didn't have issues. It's a sailboat afterall. When we inspected the interior, it turned out to be in much better shape than I thought. Areas around the deck and bulkhead fittings that looked like water damage in the pictures were actually the seams where Westerly had used chopped glass to reinforce the area. No complaints from me. My only disappointment besides the non functional engine was the horrible condition of the ports. They had to be original. The gaskets are very worn and the once clear lexan window was a milky white and cracked, probably from someone cleaning them with a ammonia based cleaner. But this was nothing that cannot be fixed for a reasonable sum of money and a lot of elbow grease. I took a deep breath then money and title were exchanged.


The owner had made arrangements for a liveaboard named Bob to give us a tow to the haul out with his inflatable dinghy. Onboard for help was my friend Rich who made the trip with me and another liveaboard named Yashi. He was only 10 or 11 but knew more about boats than I did and I'm man enough to admit it. I envied his position in life. So technically I was the "captain," but I let Yashi point out where to stay in channel and what to avoid since this was the biggest boat I've ever really been in charge of. We had just cleared the end dock 6 heading into the channel when Bob's engine quit. Everytime he'd get it going again it would die after putting it in gear. He wasn't real happy about that considering he just got it out of the shop and with his age rowing back to his boat didn't seem like the fun it could of been 40 years ago. Rich suggested we raise the sails since we are in a sailboat. So while Bob rowed back home, we raised the main and put the genny out. We might of been moving at .5 knots considering how calm it was. To make matters worse the wind was coming directly from the haul out so we had to tack back and forth in the channel about a mile to the haul out area.


After what seemed like forever we reached the haul out area and the marina staff helped us get her stern-to for towing behind the truck....then promply left for lunch since we were over a hour late. They saw the entire debacle with us sailing into haul out, tacking along the way thinking we were going to turn around and head back to the slip lol. Bet this was the first and last time they ever had that happen. But we got there in style. During the next hour while they ate lunch we took down the standing rigging and mast and set about preparing her for towing back home. Once again a hearty thank you goes out to Yashi for the help. It was a simple affair to get her on the trailer minus the load of cash they charged to pull her out. I figure they were making about 5 dollars a minute based upon the 185 dollar one way haul out fee. I'm in the wrong business. Yes that's me on top of Bebop smiling like a Cheshire cat.


The trip back was pretty uneventful minus the fact it was done at a strict 55 mph for fear of wrecking the truck and boat. Rich didn't think it was quiet that smooth since he was driving and I'm sure felt responsible for Bebop. It only represented a nice chunk of my complete net worth. No pressure. Total time in transit was 600 miles by truck 1 mile via boat sans engine. About a 16 hour day including a sunburn souvenir. Ouch. But she was safely home and ready for the refit to begin. Next time on BeBop Around the World: Taking Stock

Tuesday, November 08, 2005

The search for BeBop....

I had no idea I'd end up with a Westerly Nomad. I'd never even heard of one. I figured I'd end up with a Catalina 27, Bristol 24 or perhaps a Cape Dory 25 that would need alot of work. Ya see, they just don't make a boat under 30 feet capable of going around the world anymore. I looked at a Hinterhoeller 28 that was in my price range but she was literally sinking at the dock....the Flicka 20 is one that can do it but they cost over 20 grand. The Falmouth Cutter is another very nice boat but they sell for about 50 grand.....I was seriously depressed by all this to the point of buying a Hobie 14, a pop up tent, saying fuck it all and shoving off. Then by chance I stumbled upon this link. I didn't think much of her until I started doing the research into this boat. The Nomad beat both the Flicka and the Cutter in price and could perform at about the same level. I had a new number one boat on my realistic wish list....and I even liked the name.


So I started checking the want ad's for the little Nomad and I found one just 300 miles away in Georgia for $4500. To cut the story down a bit, I ended up sending the owner a email that read something like this. "I'm not a man of alot of means but I have a big dream to go sailing and the Nomad is a boat capable of doing it. What is the minimum you'd take for her?" The very next morning I recieved the reply. "I was going to take her off the market but I'd be willing to sell her to the right person for $3500." Perfect! I thought...if she's not sinking at the dock like that Hinterhoeller was. I asked the owner to send me a disposable camera full of pictures and I'd develop them. Quick enough they came and I developed them. The same day they arrived I called him back and said I'd take her. I then promply chewed my nails down to the quick cause I had just a little problem...


I didn't really have a way to get her from the slip in Georgia to the west coast of Florida in the amount of time I had on my vacation. It would take too long to sail her and it was hurricane season. Not a smart move since the last time I sailed anything was a Hobie Cat and it would cost me my job anyway. Enter my best friend, Rich. He understands what I'm trying to do and the dedication that I've shown by selling all my stuff and we reached a agreement for the purchase of a 6x16 dual axle trailer capable of hauling the Nomad. A deal was also struck for a place to put her on the hard until this summer while I work on the refit. Folks..you wish you had friend(s) this good.

Next time on BeBop around the world: You meet the nicest people in a marina.....

Monday, November 07, 2005

First I needed money...


Being of little net worth and working mostly paycheck to paycheck buying a awesome 20 foot Falmouth Cutter was out of the question. I'd be lucky to come up with 5 grand. But just to show you if you want something bad enough you can make it happen. So a simple plan was created. I started selling anything I owned that was worth anything. You just gotta love eBay. Oh can't forget trashing my credit rating by defaulting on my bills.

The first thing that had to go was my bike, a rare 1993 Suzuki Bandit 400. Probably for the better anyway since bikes haven't always been great to me. 3 wrecks with titanium pins in boths wrists to prove it. This provided about half the money I need to buy BeBop. Along with the bike I sold my nice Fieldsheer riding jacket, Nolan helmet and Alpinestar gloves. I felt liberated in a way knowing a bike wasn't going to be the death of me.

Next I sold off what was left of my musical equipment. My 2 amplifiers and 3 bass guitars. This was pretty painful to part with. I recorded a demo with those basses with my old band. Call it sentimental value but it was a painful day to package them up and sell them off. Wasn't really able to play much anymore anyway because of the pins in my wrist. By selling this stuff off it provided me with the rest of the money I needed to buy my boat. The sacrifice was noted in the name I gave my boat too. I suspect I'll pick up something in the woodwinds family down the road and learn to play yet another instrument.

I still have some major items I need to part with over the next few months. What's left of my major consumer items will provide BeBop with new ports, paint and rigging. It all will have to go. Firearms, Blueprints, TV, Desktop Computer. There is no room onboard for it. It's a time consuming process to sell it all off and more than a bit stressful sometimes. I worked my ass off to buy that stuff only to get rid of it. But at the end of it all as Brad Pitt in Fight Club said, "The things you own end up owning you." So true and so easy to forget. Consumerism and Materialism are a evil thing. Who cares what the neighbor's have and you don't. Let them have the bill for it too.

Next post: The search for BeBop

Sunday, November 06, 2005

This is how the story starts.....


I guess you could say I'm just not a happy shiny person. Never have been and probably never will be. I just wanted my little slice of the pie. That didn't happen either. Some might say from lack of effort or being too nice a guy to sell you shit you don't really need. So I remain without alot of money but have a lot of practical skills thru having to fix stuff myself or just my very inquisitive nature. This lead me to how I discovered the true nature of things and what's happening in the world. No I didn't find religion or some such thing, but I'll be sure to speak on that subject at some point I imagine. I'm speaking mainly of resource depletion and how in my discovery it's allowed me to revise, then revive a 10 year old dream to buy a boat and sail it alone around the world.

Over the course of my blog, I'll first highlight the refit of my sailboat "BeBop" and the construction of my dinghy for her. Later the difficulies on living aboard a small boat and all the cool places I hope to visit. I'll follow this post up tomorrow with the story of BeBop and just what I had to sacrifice to get her. Until then here is a picture of her. She needs some work and will be "on the hard" until this summer for a refit, but she's one of the smallest sailboats ever made that can take you around the world in relative comfort.